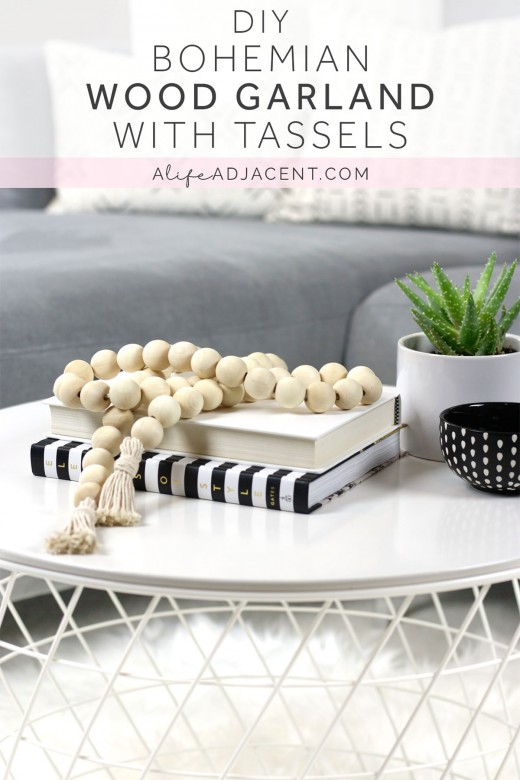
Learn how to make DIY wood bead garland with tassels and add natural wood texture to your living space. Use it to style your coffee table, sideboard, mantel or Christmas tree, and add a touch of bohemian flair to your home. You can also use the wood beads as a natural essential oil diffuser. This article includes a detailed step-by-step tutorial as well as instructions for making cotton tassels for your wood garland.
Have you ever seen something on Pinterest or on your favorite Instagram account and thought, “Oh, I can make that!”? Then, you do a quick Google search and realize that it’s been done. A lot.
Well, even though that happened, we still wanted to share this DIY wood bead garland for its simplicity. We also liked this decorative garland for its sustainable, eco-friendly, natural elements and versatility. Because besides looking pretty, the wood beads also do double duty as a homemade wood bead essential oil diffuser.
Plus, making this homemade wood bead garland was definitely cheaper than buying it, and that’s the goal of a good DIY, right?


Supplies for making a wood bead garland
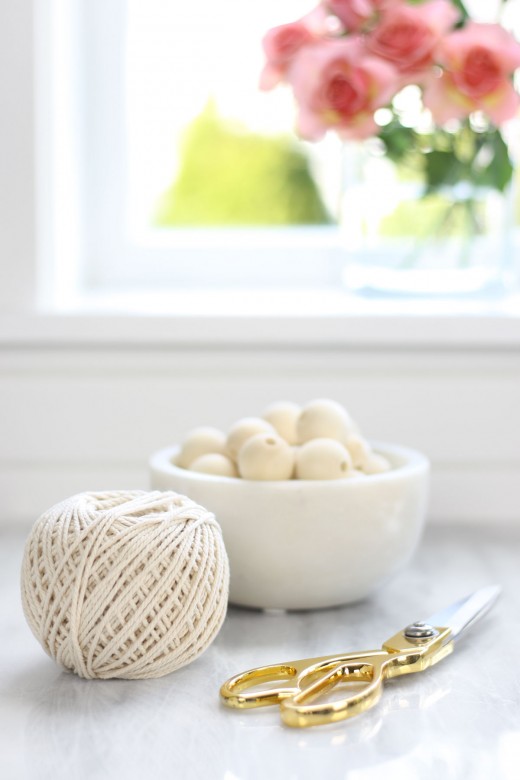
To make this wood bead garland with tassels, you will need the following easy to find materials:
- Natural wood beads
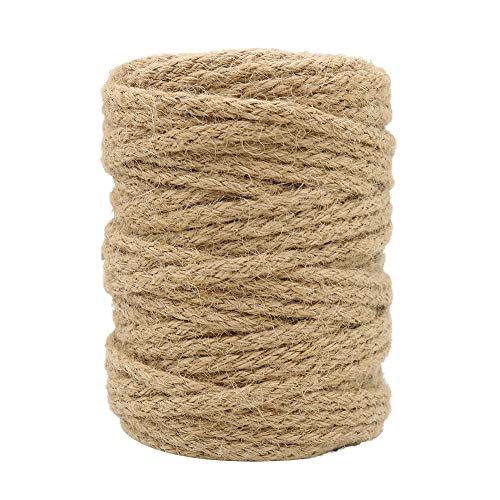
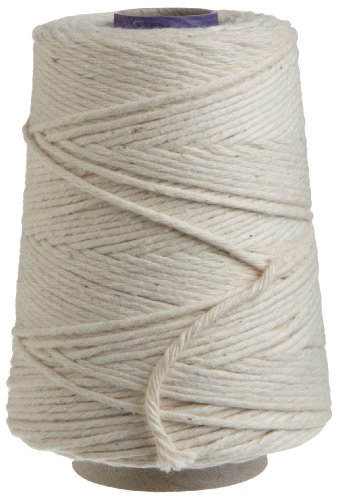
- Natural string, such as cotton twine, yarn, jute twine, or leather cord
- Large embroidery needle (or simply use scotch tape)
- Essential oils (if you intend on using it as wood bead diffuser)
You can also paint or wax the wood beads beforehand, if you prefer. But we liked the natural pale wood tone of the beads, so we strung them without waxing or painting them. If you plan on using the garland as a wood essential oil diffuser, don’t wax or paint the beads.
NOTE: You can use a large embroidery needle, if you have one on hand, instead of the scotch tape method for stringing the beads that is discussed below. But we found that wrapping the ends of the string with scotch tape is an easier and quicker way to make this garland.
How to make a DIY wood bead garland with tassels
This bead garland requires two tassels to complete the look. But you can skip the tassels and make a wood bead garland without tassels, if you prefer.
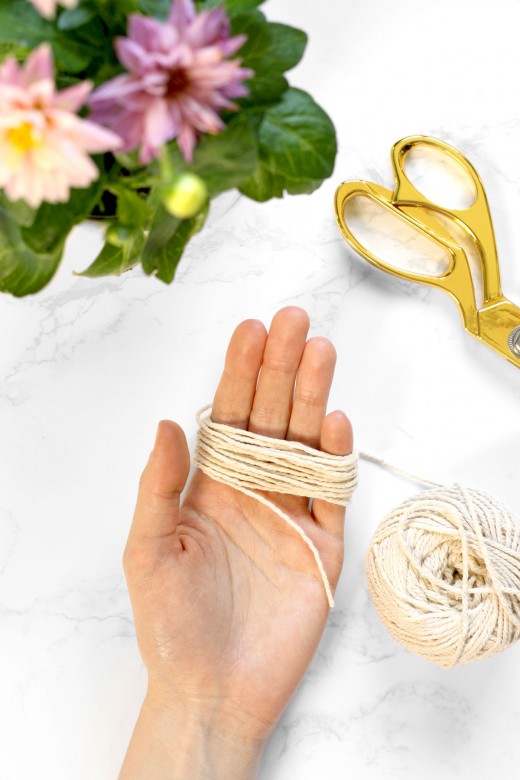
First, to make a tassel, wrap your cotton string around your hand approximately 20 times, starting and ending with both end pieces going in the same direction (as shown in the photo below).
Next, about a third of the way down, tie off the top part of the tassel. Then, wrap your string approximately 12-15 times around, creating a uniform edge. Be sure to tie off the end that doesn’t include the already cut strings, which should be facing downward.
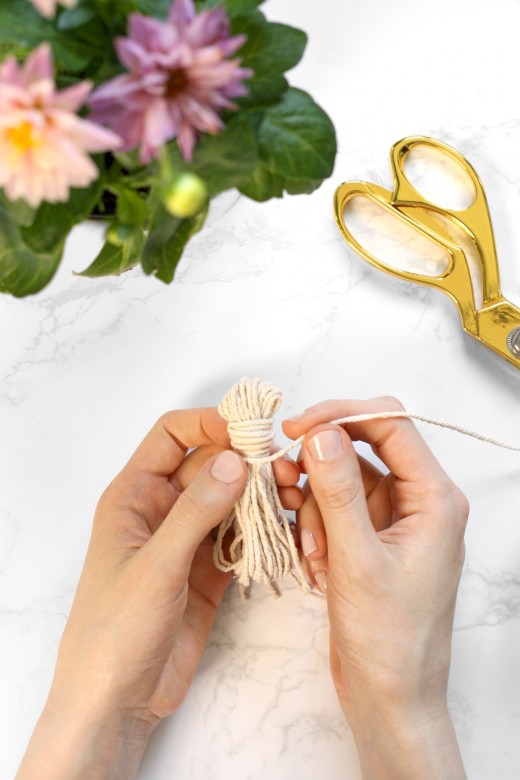
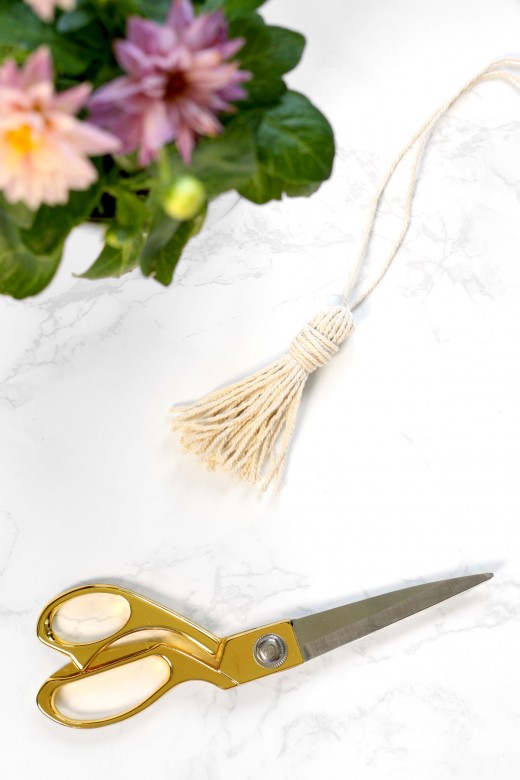
After wrapping, tie the ends in a tight knot, allowing the pieces to hang down and become part of the tassel. Or, clip them off and tuck them under the wound string, if you prefer.
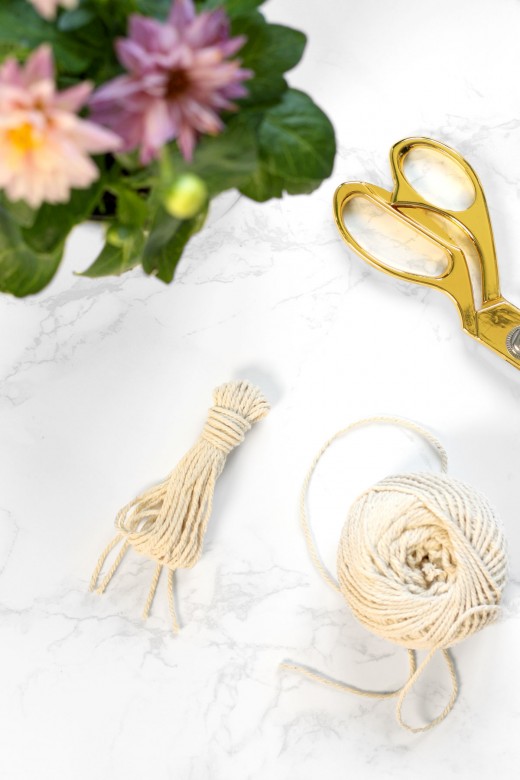
Next, cut the bottom loop to create your DIY cotton tassel. Trim evenly, if necessary.
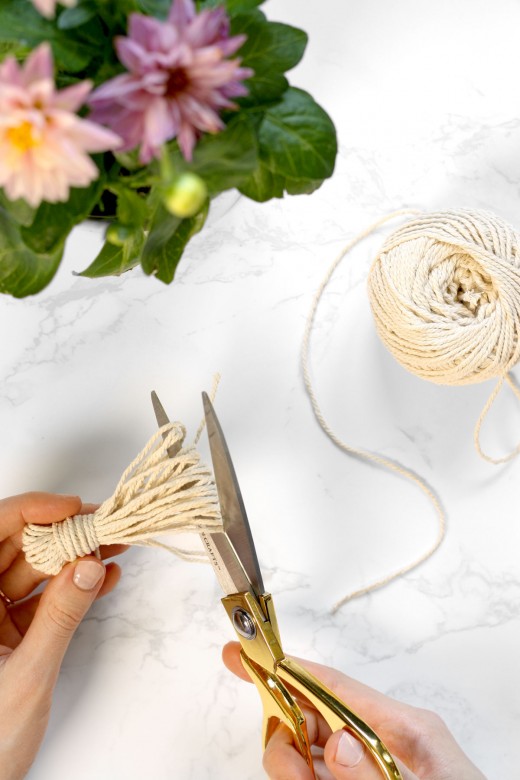
Use scotch tape to wrap one end of the cotton string (while it’s still on the spool) to create a stiff tip, and then thread the string through the top of your tassel.
Don’t cut your string off the spool until you’re sure how much you need. You’re going to string the wood beads with your string doubled, so you need to pull the length of string you will require completely through, double it, and then add a few inches BEFORE you cut your string from the spool.
The length will depend on the number of wood beads you plan to string.
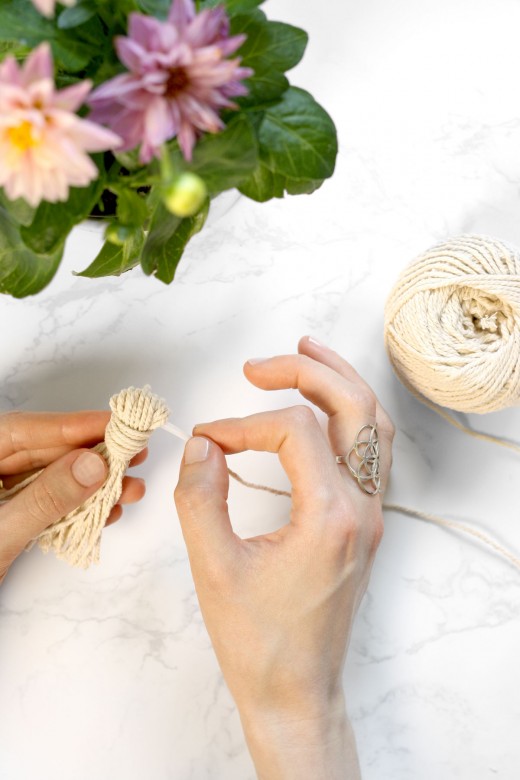
Once you determine the correct length, tie a knot at the top of your tassel to anchor it. (See photo.) Our natural wood bead garland was 48” long, so the amount of string we used was 100 inches (or approximately 8′ 4″).
To begin stringing your wood beads, tape both pieces of your string ends together to create another stiff tip so that you can thread both pieces of string easily though the beads.
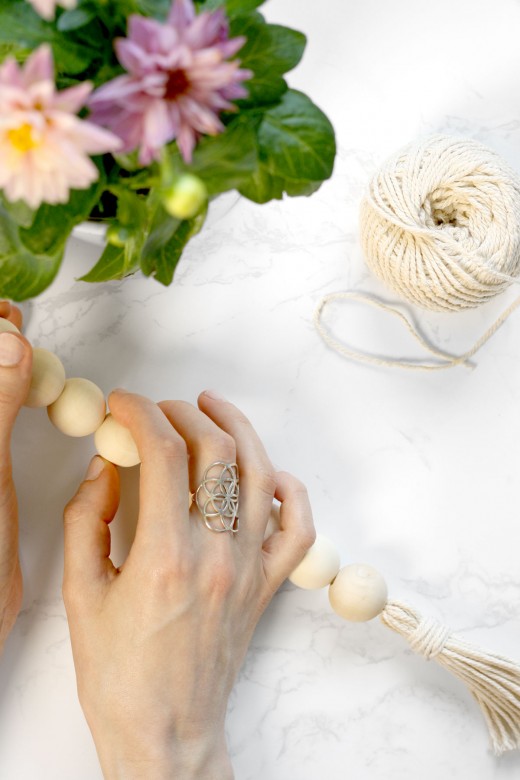
Once your wooden beads are completely strung, cut off your double scotch taped end and pull one side of string through the top of your second tassel.
With the other end of your string, create a knot at the top of the tassel in the same way you did with the first cotton tassel. Tie your knot tightly, cut and hide the ends in the loop. Make sure the knot is secure before you clip the ends of your string.
How to use your wood bead garland
Your finished homemade wood bead garland can be artfully strewn anywhere in your home. The beads are perfect for easy coffee table or sideboard styling, and also look lovely draped over a vase or on a pile of books.

As well, depending on how long your finished wood bead garland is, it can be used as decorative garland for your Christmas tree. Or it can be draped on your fireplace mantel, along with some fresh greenery, for a festive display during the holiday season. The beads also look lovely draped across a pretty wood bowl.

To use the wood beads for aromatherapy or to quickly freshen the air in your home, add 8-10 drops of your favorite essential oils to the beads. We often use our sugar cookie essential oil blends or our caramel blends on the garland because these blends make our home smell like fresh baking. Instant homemade essential oil diffuser!
Overall, we think this DIY wood bead garland with tassels is a simple and inexpensive way to add a natural wood element, texture and bohemian flair to your coffee table, dining table, credenza vignettes or holiday decor. It’s also an easy way to enjoy the aromatherapeutic benefits of your favorite essential oils.

Homemade touches like this lend a personal touch to your living space – they’re like jewelry for the home. And, this eco-friendly wood bead garland with tassels is one of the simplest natural home DIYs we’ve ever shared! We hope you found this tutorial easy to follow.

If you have any questions or comments about this project, please let us know in the comments below.

DIY Wood Bead Garland with Tassels
Learn to make an easy DIY wood bead garland with cotton tassels. This inexpensive homemade decor piece adds an element of natural wood texture to any living space. Use it to style your coffee table, sideboard, mantel, or to add a touch of bohemian or farmhouse flair to any corner of your home.
Materials
- Wood beads
- Cotton string, yarn, jute twine, or leather cord
- Large embroidery needle (or simply use scotch tape)
Instructions
- This garland requires two tassels. To make a tassel, wrap your string around your hand approximately 20 times, starting and ending with both end pieces going in the same direction (as shown in the photo).
- Next, about a third of the way down, tie off the top part of the tassel. Then, wrap your string approximately 12-15 times around, creating a uniform edge. Be sure to tie off the end that doesn’t include the already cut strings, which should be facing downward.
- After wrapping, tie the ends in a tight knot, allowing the pieces to hang down and become part of the tassel. Or, clip them off and tuck them under the wound string, if you prefer.
- Next, cut the bottom loop to create your tassel. Trim evenly, if necessary.
- Use scotch tape to wrap one end of the cotton string (while it’s still on the spool) to create a stiff tip, and then thread the string through the top of your tassel.
Don’t cut your string off the spool until you’re sure how much you need. You’re going to string the beads with your string doubled, so you need to pull the length of string you will require completely through, double it, and then add a few inches BEFORE you cut your string from the spool.
The length will depend on the number of beads you plan to string. - Once you determine the correct length, tie a knot at the top of your tassel to anchor it. (See photo.) My garland was 48” long, so the amount of string I cut was 100 inches.
- To begin stringing your beads, tape both pieces of your string ends together to create another stiff tip so that you can thread both pieces of string easily though the beads.
- Once your beads are completely strung, cut off your double scotch taped end and pull one side of string through the top of your second tassel.
With the other end of your string, create a knot at the top of the tassel in the same way you did with the first tassel. Tie your knot tightly, cut and hide the ends in the loop. Make sure the knot is secure before you clip the ends of your string.
Notes
- You can also paint or wax your wooden beads. I liked the natural pale wood tone of the beads, so I strung them as is onto cotton string.
- You can also use a large embroidery needle, if you have one on hand, instead of the scotch tape method, but I find wrapping the ends of the string with scotch tape is easier and quicker.
- You can also use your wood bead garland for your Christmas tree. Simply make the garland longer to fit your tree.
Recommended Products
As an Amazon Associate and member of other affiliate programs, we earn from qualifying purchases.


More DIY ideas
Looking for more creative home tutorials? Check these out:
- DIY Mudcloth-Inspired Prints
- IKEA Hack: DIY Fuzzy Stool
- Repurposing the IKEA Hemnes Shoe Cabinet
- DIY Gold Leaf IKEA Vase Hack
- DIY Tropical Prints (+ Free Printable)
For even more DIYs for a natural home, follow us on Pinterest! You can also find us on Instagram, Facebook and Twitter.
Pin it for later

Mona
Friday 9th of July 2021
I love it. What is the size of the wood beads
Kim
Friday 9th of July 2021
Thanks, Mona! The size of the wood beads is approximately 25mm or 1 inch.
Jauquetta
Tuesday 17th of December 2019
Please sign me up for your emails. I can't wait to try your overnight face mask. My skin is differently drying out at night. Always had oily skin but now, with age, it's gotten dry. I'm just now, at 70, getting wrinkles so the oily skin worked in my favor! Not sure what an overnight sleep mask is, appliance wise. Will check that out.
Kim
Wednesday 18th of December 2019
Hi Jauquetta, we will email you! Thanks for reading! Hope you enjoy the sleep mask if you try it.