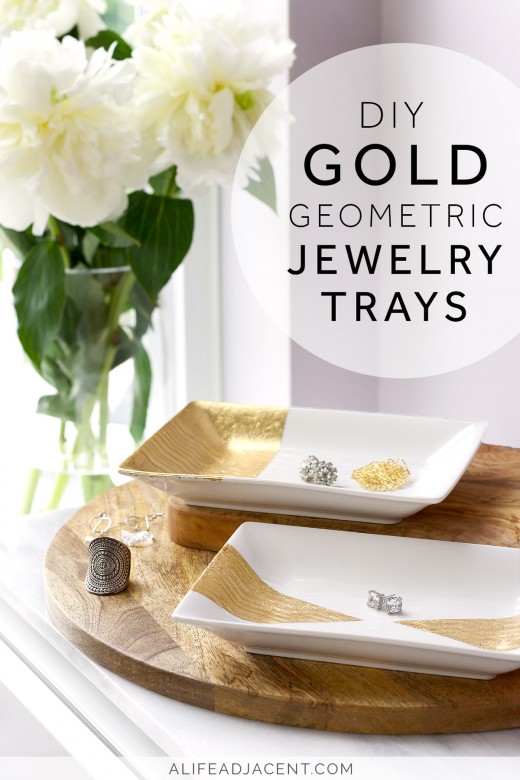
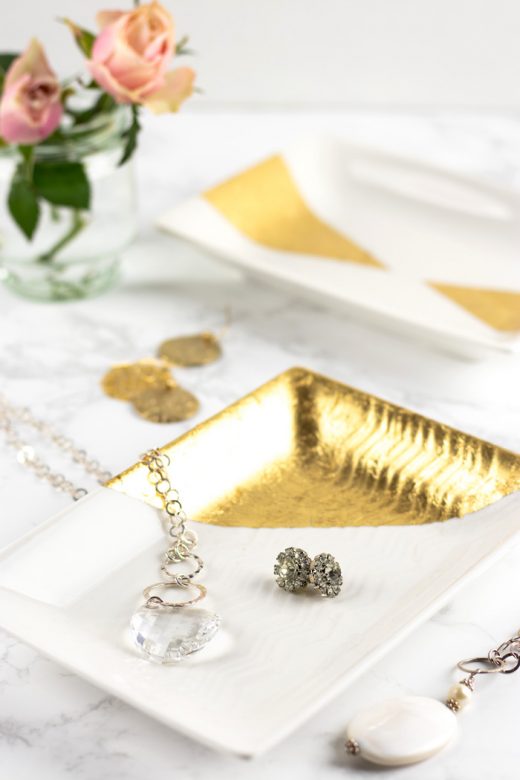
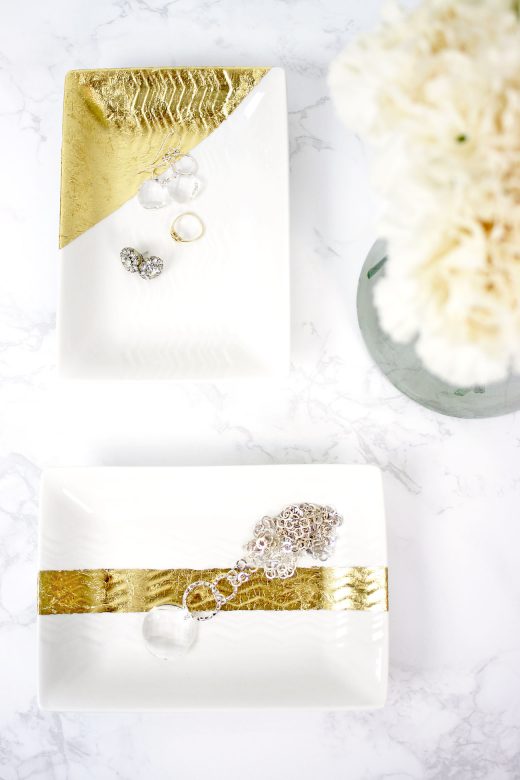
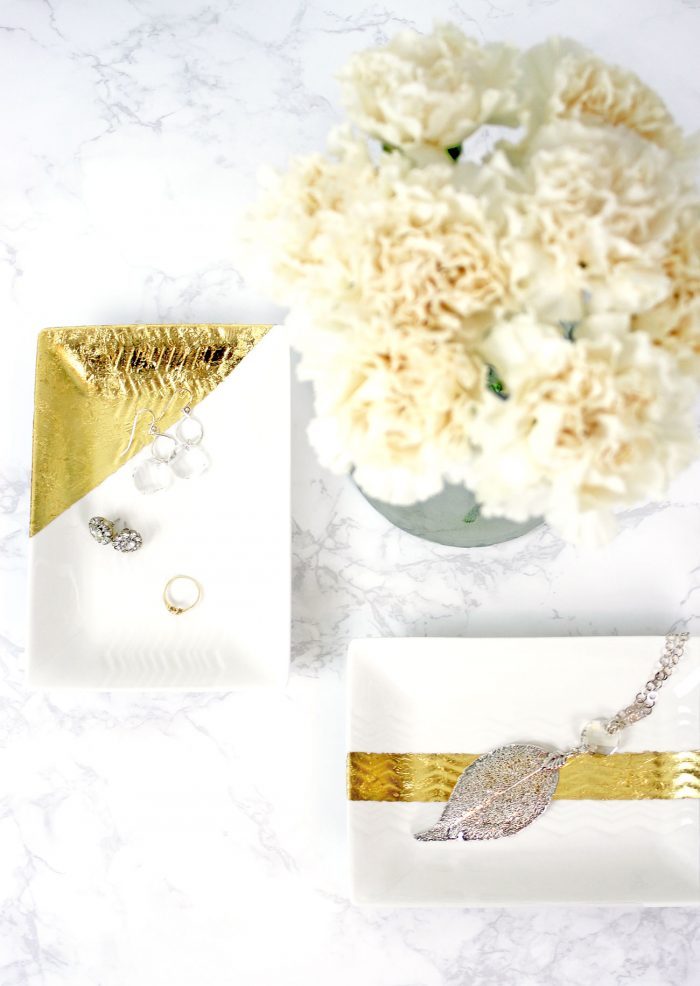
I bought a set of small white rectangular 7″ x 5″ serving plates to use for jewelry and other odds and ends. However, since the trays I purchased were very plain, with a simple etched pattern, I thought that adding interest to them with gold leaf might make them more appealing.
I’ve seen similar gold and white jewelry trays retailing for significantly more than the $20 I paid for my supplies, which were used to create 4 trays. For instance, without naming names, one well-known designer retails a very small gold and white jewelry tray for more than $70.
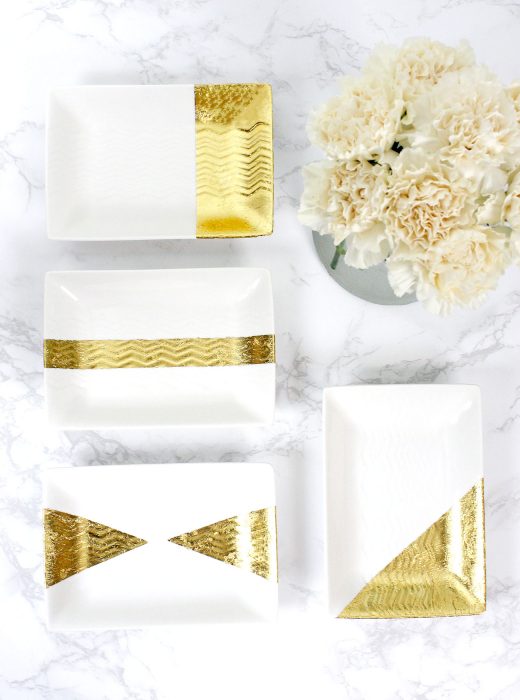
And since I did get a deal on gold leaf, I thought gold leafing with geometrical patterns would be the most economical way to jazz up these simple trays.
DIY Gold Leaf IKEA Vase Hack

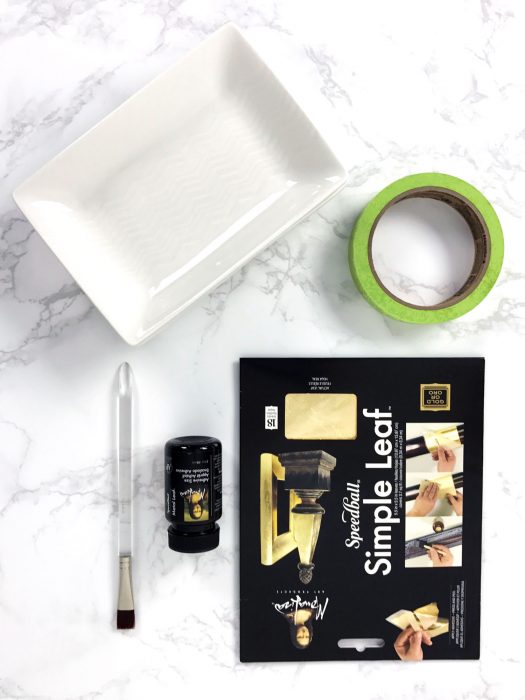
Supplies for DIY jewelry trays
Okay, let’s get to the supplies. I had the paintbrushes on hand, so if you’ve already got your basic tools, the majority of the supplies are easily found on Amazon.
- Gold leaf or gold leaf kit
- Adhesive size
- Spray sealer (or brush on sealer)
- Small trays or plates (or pretty wooden dishes)
- Soft paintbrush (or cotton gloves)
- Painters tape (or 1/4″ duct tape, or thicker tape)
How to make gold leaf jewelry trays
First, thoroughly clean your dishes, removing all dust, lint, or price tag residue.
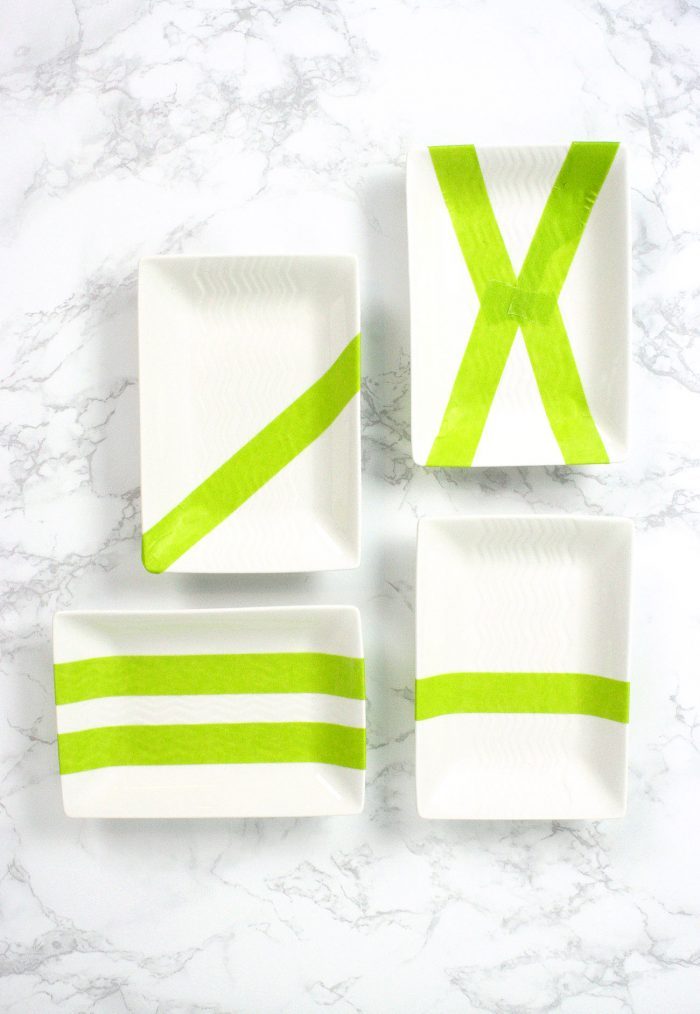
Next, tape out your preferred patterns. Use the suggested patterns below or create your own. Be sure to seal the edges of the tape very well with your finger. I can’t emphasize this enough if you want clean, straight lines.
Apply the adhesive gold leaf size (the technical name for gold leaf adhesive is size) according to the directions on the bottle. There’s a curing time until the adhesive size gets tacky, so wait it out until it’s ready or the gold leaf won’t adhere correctly.
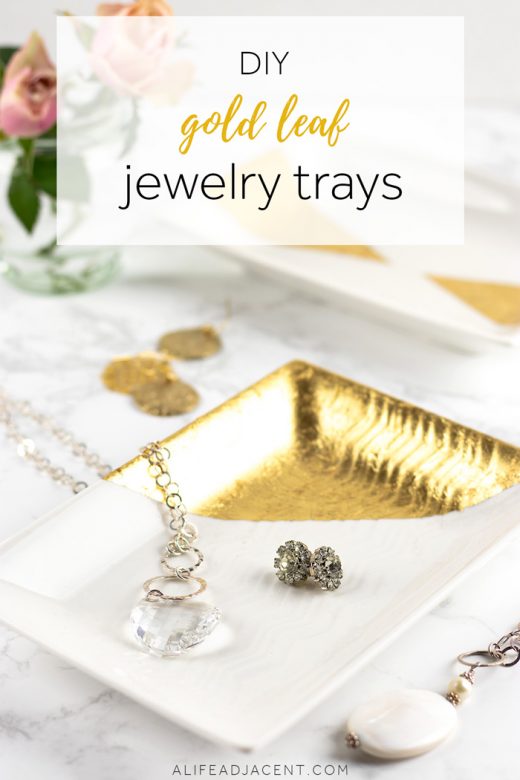
Next, carefully (and I mean carefully – those gold leaf pages are finicky) apply the gold leaf to the areas of your tray that you’ve covered with the adhesive.
Gently smooth down the gold leafing with a soft cloth or clean paintbrush. Cotton gloves also work well for this task. Use any excess gold leaf that falls off to apply to the next spot. For an abstract or rustic look, don’t worry about the gold leafing being applied too perfectly.
Let your trays dry according to directions, or overnight.
Next, apply gold leaf sealer and let it dry thoroughly before using your trays. Please note that gold leaf is not food safe so after gold leafing, please don’t use the trays for anything other than holding jewelry, or other odds and ends.
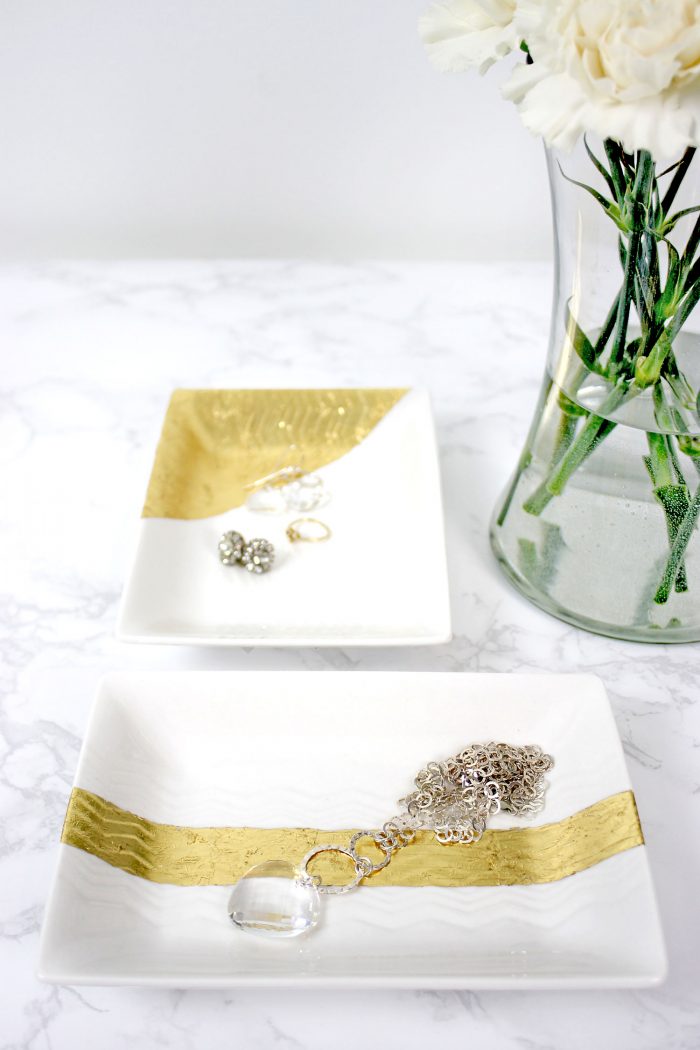
How to use your DIY jewelry trays
These trays aren’t just for jewelry either. They also look lovely on a desk as they’re the perfect size for holding paper clips, post-it notes, random bills, or other small office supplies. A larger tray would be perfect at the front door for catching keys and mail.
These trays would also make for simple, yet economical gifts, since creating 4 gold geometric jewelry trays cost less than $20!
Would you be happy to receive jewelry trays like these as a gift? Please feel free to share your comments or questions below.

DIY Gold Leaf Trays for Jewelry and More
What You'll Need
- Gold leaf or gold leaf kit
- Adhesive size
- Spray sealer (or brush on sealer)
- Small trays or plates (or pretty wooden dishes)
- Soft paintbrush (or cotton gloves)
- Painters tape (or 1/4" duct tape, or thicker tape)
Instructions
- First, thoroughly clean your dishes, removing all dust, lint, or price tag residue.
- Next, tape out your preferred patterns. Use the suggested patterns below or create your own. Be sure to seal the edges of the tape very well with your finger. I can't emphasize this enough if you want clean, straight lines.
- Apply the adhesive gold leaf size (the technical name for gold leaf adhesive is size) according to the directions on the bottle. There's a curing time until the adhesive size gets tacky, so wait it out until it's ready or the gold leaf won't adhere correctly.
- Next, carefully (and I mean carefully – those gold leaf pages are finicky little suckers) apply the gold leaf to the areas of your tray that you've covered with the adhesive. Gently smooth down the gold leafing with a soft cloth or clean paintbrush. Cotton gloves also work well for this task. Use any excess gold leaf that falls off to apply to the next spot. If you like an abstract or rustic look, don't worry about the gold leafing being applied too perfectly.
- Let your trays dry according to directions, or overnight.
- Next, apply gold leaf sealer and let it dry thoroughly before using your trays. Please note that gold leaf is not food safe so after gold leafing, please don't use the trays for anything other than holding jewelry, or other odds and ends.
More Easy DIYs
If you enjoyed this easy tutorial, you may also like:
Pin it for later